To avoid quality issues and process problems its important to Verify the amount of solder paste on a board prior to proceeding to the Pick & Place process. Up to 70% of the end-of-line Quality is related to the Printing process. On-board Paste Verification in the Printer or External inspection in an Automated Solder Paste Inspection (SPI) machine can avoid a lot of problems.
Solder Paste Inspection
ASMPT
Advanced Process Expert software is used for DFM analyse, Process Optimizing and Closed Loop Control of almost all settings on your Stencil Printer.
MEK
MEK is an industry leader in Automated Optical Inspection and Solder Paste Inspection.
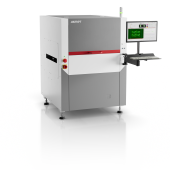
MEK’s latest 5D SPI systems, the Iso Spector S3 series, offer a comprehensive suite of advanced features to optimize the solder printing process , at very low cost.
ASM DEK Hawkeye - on board Inspection
ASM ProcessLensHD
MEK Inspection Solutions

ASMPT HawkEye - On board 2D Paste Verification in DEK Printers
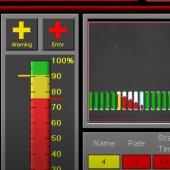
HawkEye is a low cost, clever option for your DEK Stencil Printer to verify if sufficient paste is printed on selected locations. The tool is easy to program and compares the size of the aperture in the stencil with the printing result. If defects are detected, the printer can clean the stencil and reprint on the same board to fix the problem.

ASMPT Process Lens (HD) and Work Optimization
ASMPT Process Lens is a high end 5D Moire SPI System. It seemlessly Integrates with ASMPT's Works Optimization and offers the first process expert system in the world that can optimize your DEK Stencil Printer and close-loop controle almost all parameters of your Printer. Process Lense is now aslo available in a HD Version , for even faster or more accurate measurements.
More information on Process Lense More information on Works Optimization

MEK Iso-Spector 5D Solder Paste Inspection
MEK Iso Spector uses two digital Moire Projectors for accurate 3D measurement in combination with an advanced 360 degree Ring Light that will isolate the solderpaste from other items on the board. The Z-Axis Auto-Focus will measure PCB warpage and automatically compensate the paste measurements.
The system offers Resolution Switching, allowing the user to switch between speed and high resolution modes.
It can also detect Foreign Materials and measure glue dots.


